# Installation
Getting up and running with Finch Studio is quick and painless. Finch Studio is available on all 3 major operating systems (Windows, MacOS, and Linux). To date, it has been used and tested on Windows Vista, 7, 8, and 10, Linux Ubuntu, and MacOS Catalina, although it is expected to work on other versions of these operating systems.
# Installation Files
Windows (v1.6.0)
Mac (v1.6.0)
Mac (Zip) (v1.6.0)
Linux (AppImage) (v1.6.0)
Linux (deb) (v1.6.0)
For information on release history, please see the version changelog.
Older Versions (opens new window)
# Windows
Download and run installer.
# MacOS
Download and run installer.
# Linux
# .deb (Recommended)
Download installer, navigate to location of installer and run the following command (replace x with the actual version number):
sudo dpkg -i finch-studio_x.x.x.deb
# .AppImage
Download Finch-x.x.x.AppImage. Right click file > Properties > Permissions > Execute > 'Allow executing file as a program'. Double click downloaded file to start application.
# Required Dependencies
Currently, Finch Studio only supports modeling with NONMEM. A valid NONMEM installation (opens new window) should be available when using Finch Studio. Additionally, it is highly recommended that PsN (opens new window) be installed and configured when using Finch Studio to take full advantage of all features.
# NONMEM, PsN, and R Paths
NONMEM and PsN: If properly installed, PsN should be available in the system path. Finch Studio will automatically find the location of the PsN installation and identify the NONMEM versions installed on the user’s computer from the PsN config file. Please make sure that the PsN config file contains the preferences for the default NONMEM version.
R: The latest installation of R is used by default. The user has the ability to select which version of R they would like to use under the Dependencies drop down in the settings tab.
TIP
You can check if dependencies are correctly installed for use with Finch Studio by clicking on the Settings icon in the bottom left of the Finch Studio interface, and opening the dependencies panel.
# Activate License
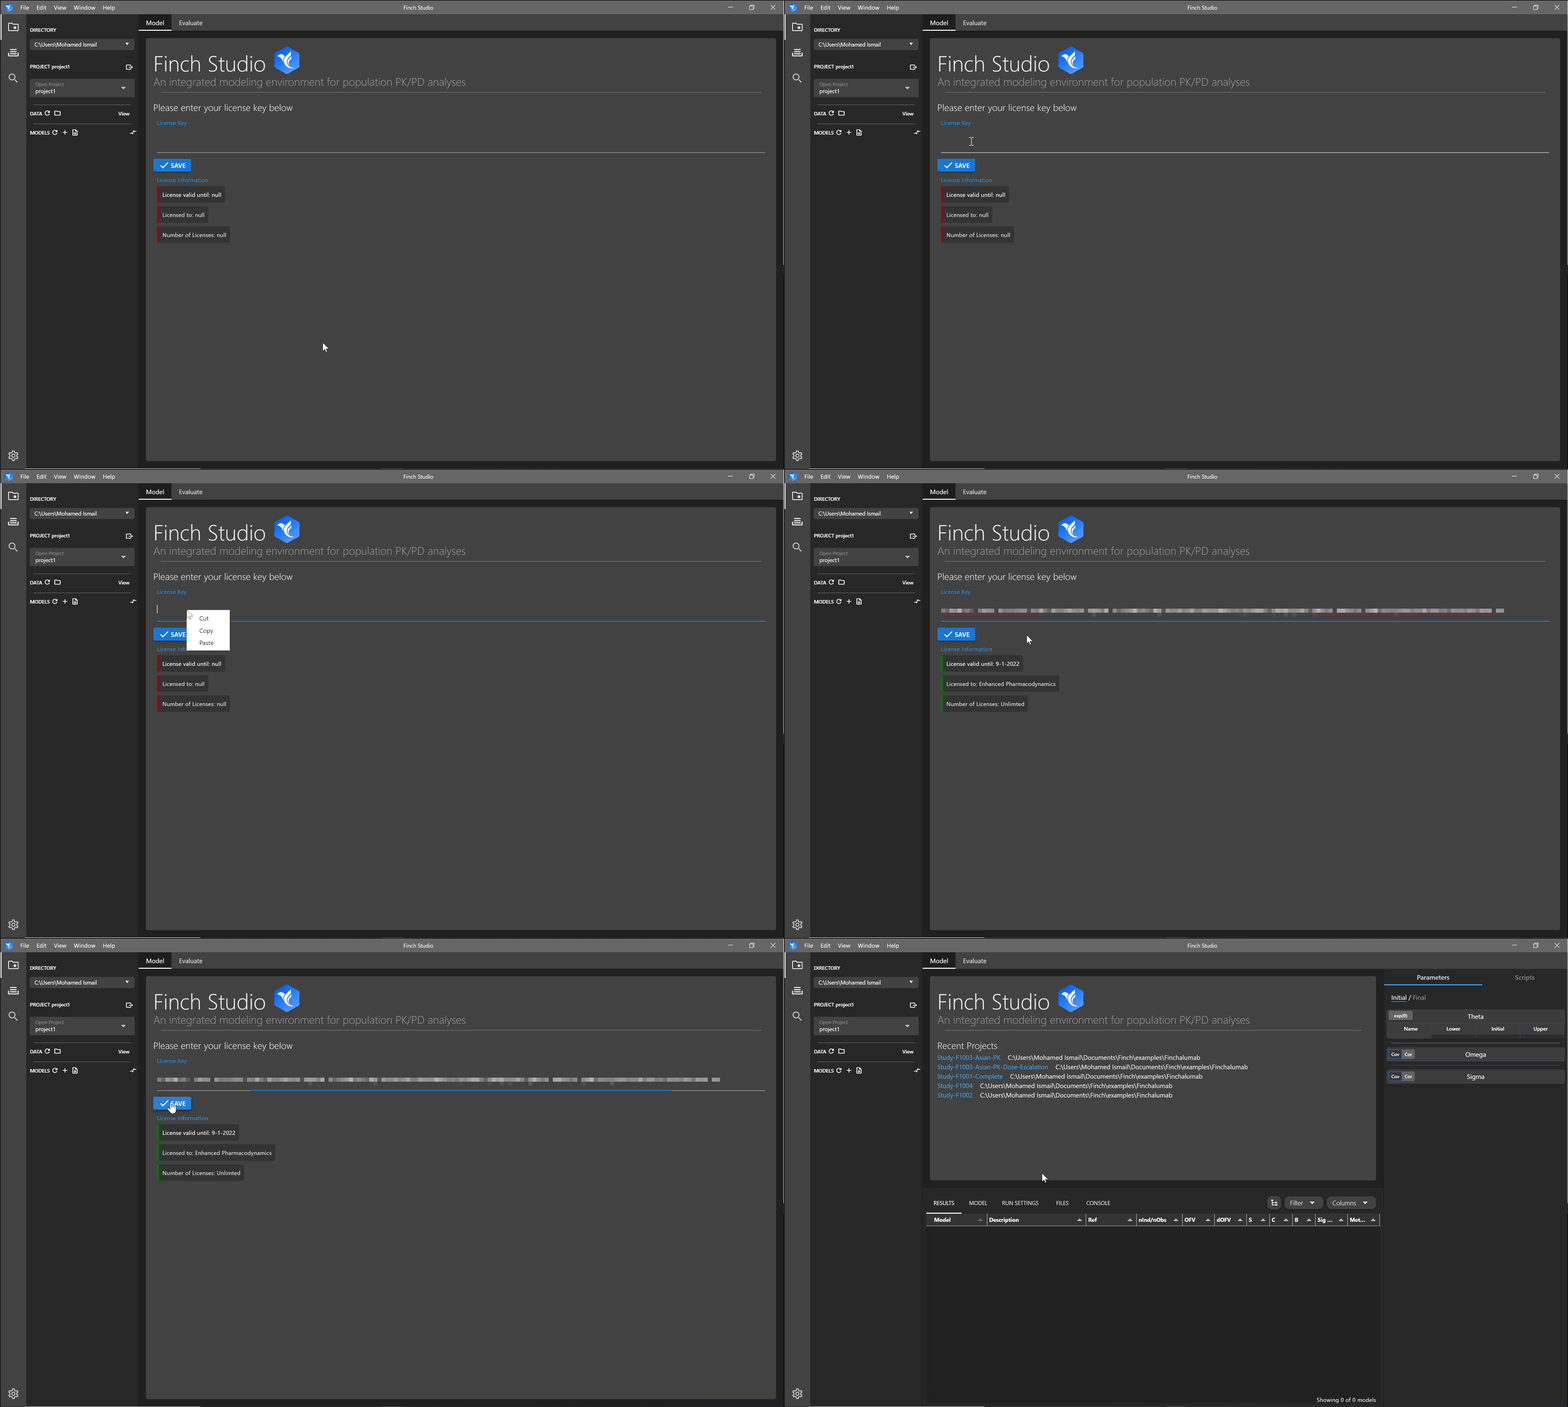
When opening Finch Studio for the first time, you will be prompted for the activation key. Paste the activation key into the prompted area. Information about the license will be displayed. Click Save to activate the license. The license is saved in a folder called Finch Studio in your home directory. For system administators wishing to activate the software for multiple users, save the license file in the Finch Studio directory for all users.

# Other Versions
# Ubuntu 18.04
If using Ubuntu 18.04 please use version below.