# Model Workbench
# Creating a Model
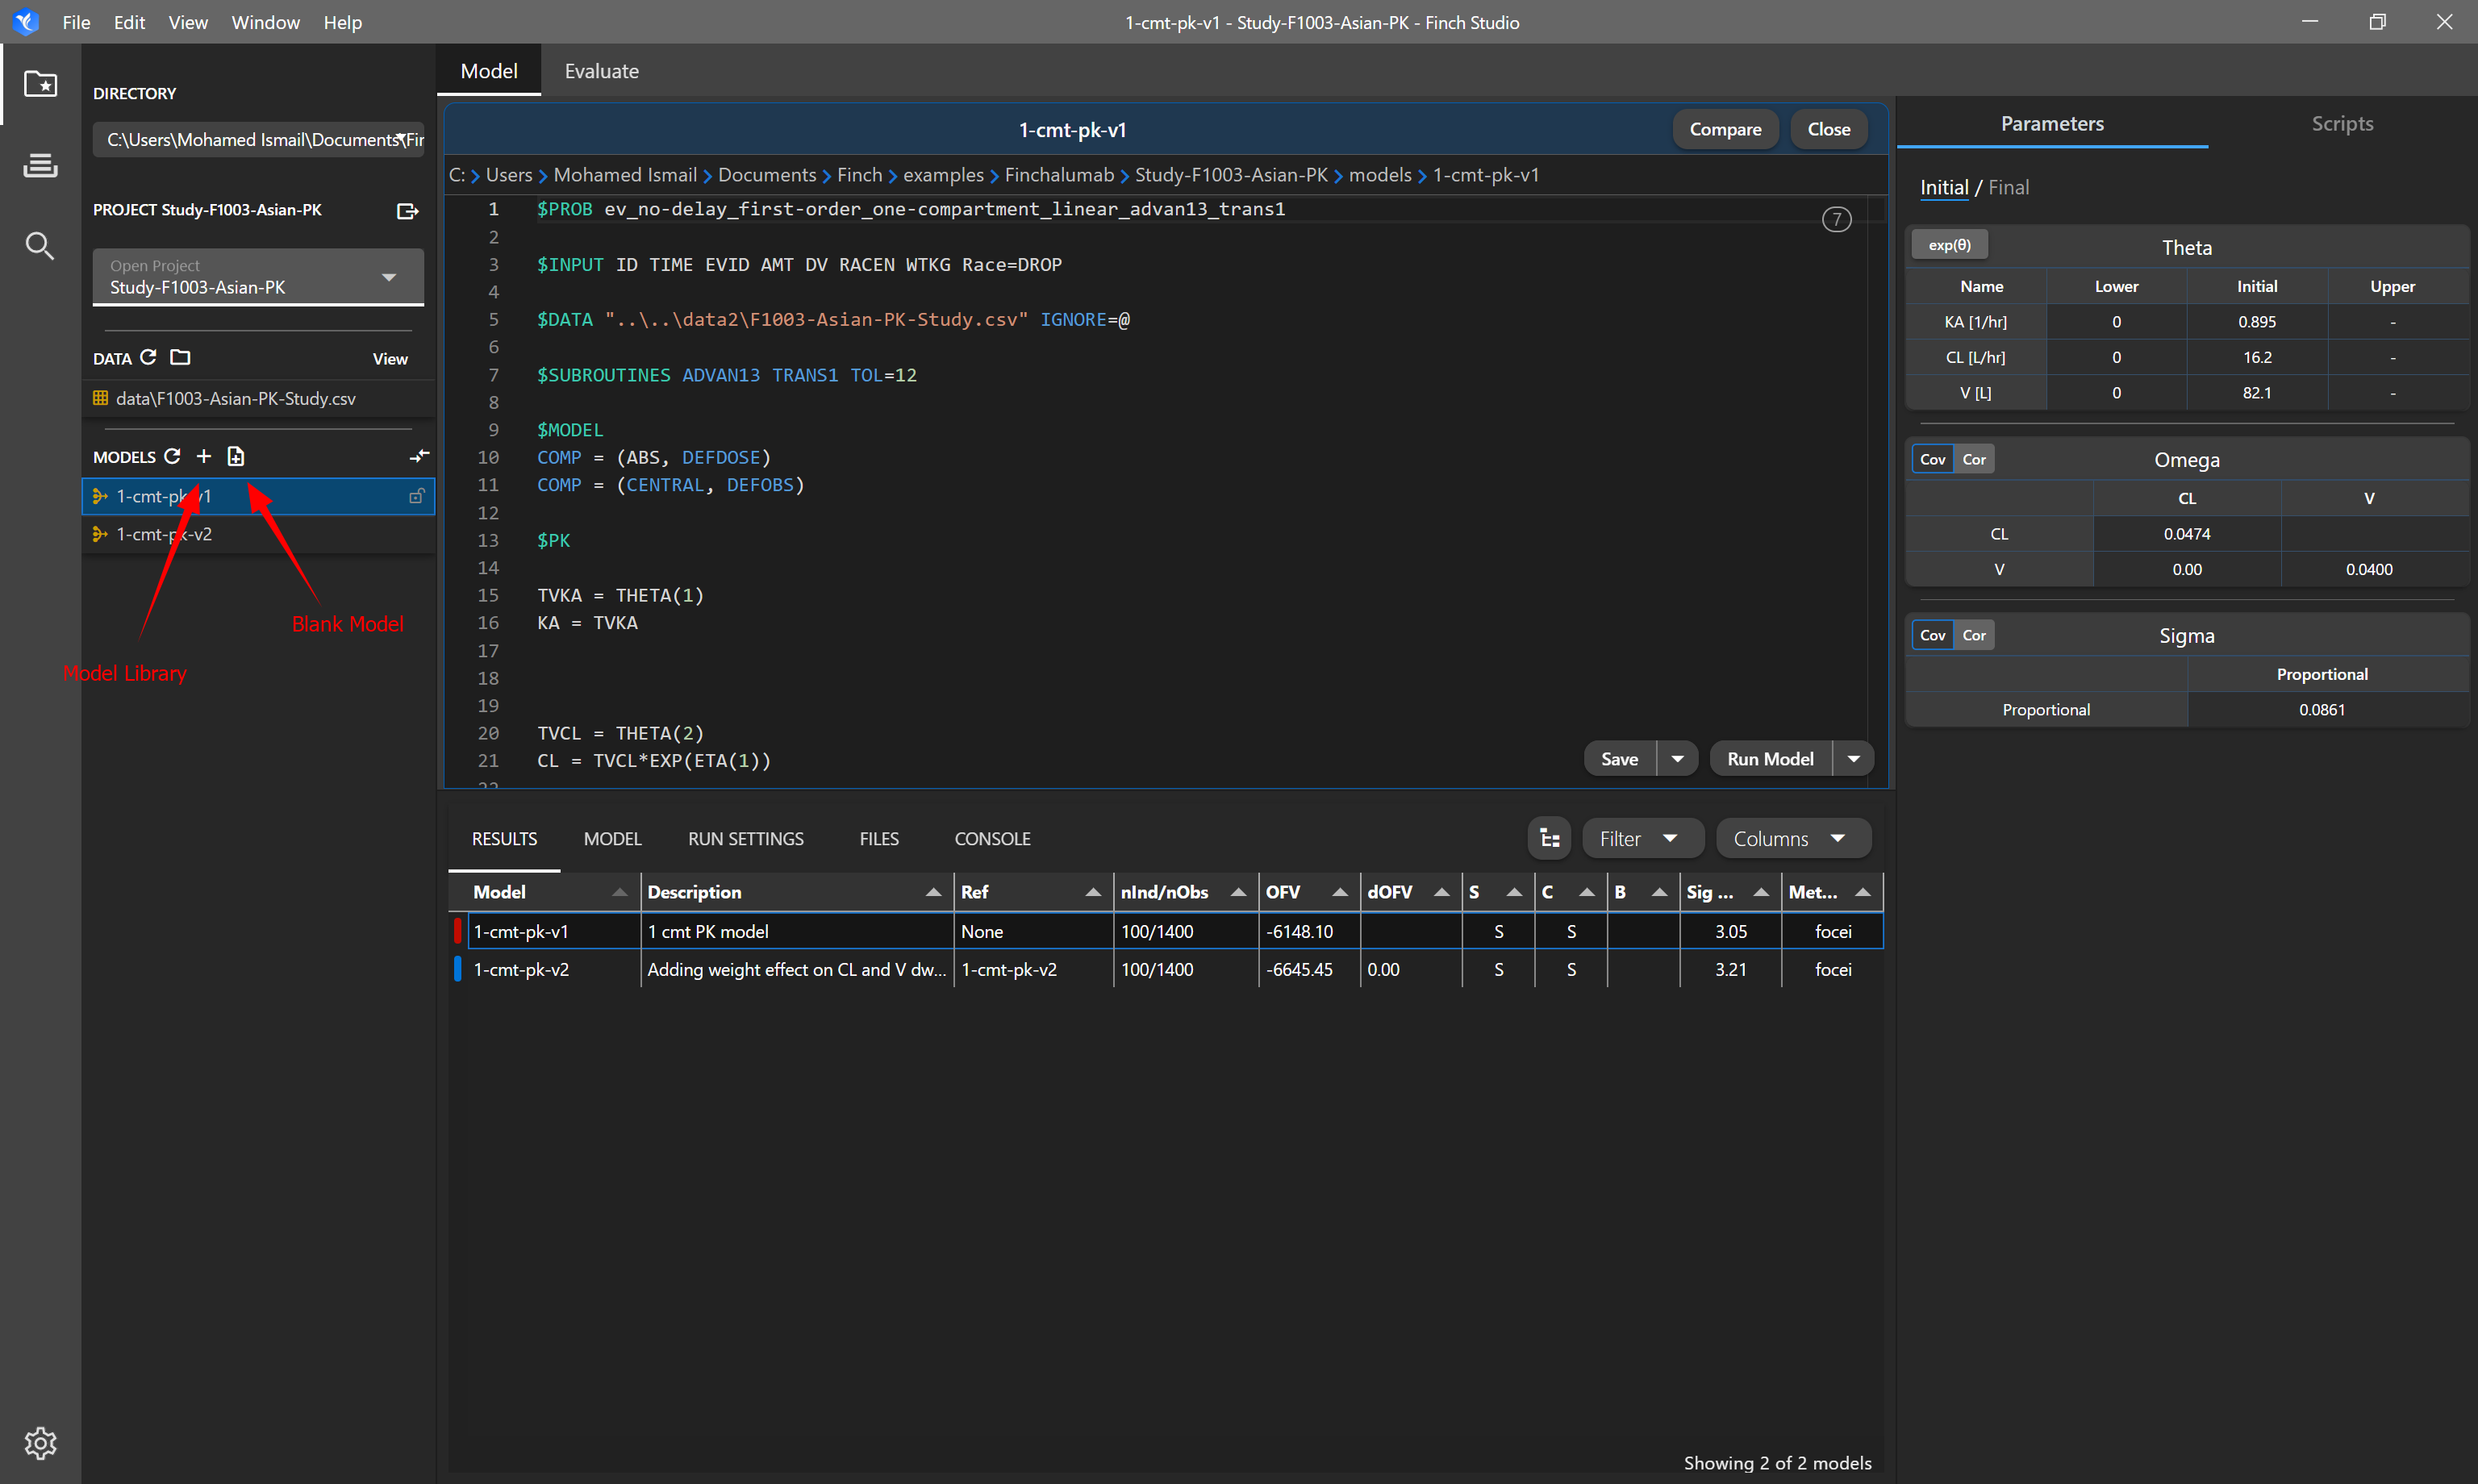
Before creating a model, you should have selected the dataset you are working with and mapped the variables in the data. By doing this, several blocks will be auto-populated when creating a new model. The $TABLE blocks will be created based on your mapped covariates. $DATA will be autopopulated with the path of your dataset and $INPUT will be autopopulated with the column header names.
There are two options when creating a new model, creating a blank model or choosing a model from the model library. Creating a blank model will, as the name implies, give you a blank control stream but the autopopulated blocks will already be filled in ($DATA, $INPUT, $TABLE). Creating a model from the library will allow you to select a model from the model library. Once you are finished selecting the model, the control stream will be available for further editing (i.e. to modify initial estimates).
# Running and Queueing Models
# Running a Model
To run a model, right click on the model within the list of models on the left panel > Run > 'Select the command you wish to execute'. You may also run the currently selected model by using the button in the button right of the control stream editor. To use the main run command, click the Run Model button, or use the drop down to choose a secondary run command.
# Tracking Running Models
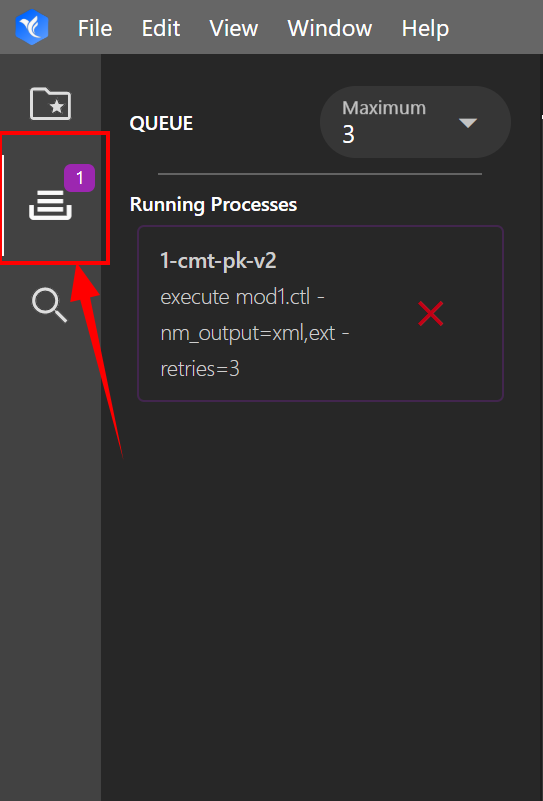
Once you start running a model, you will see a purple badge appear on the left-most panel. The purple badge indicates how many running processes are currently going. Click on the model queue tab to view the currently running models. From this interface, you may kill running processes and change the maximum number of running processes at one time. If the number of process started exceeds the maximum, the model will wait in a queue until other processes complete.
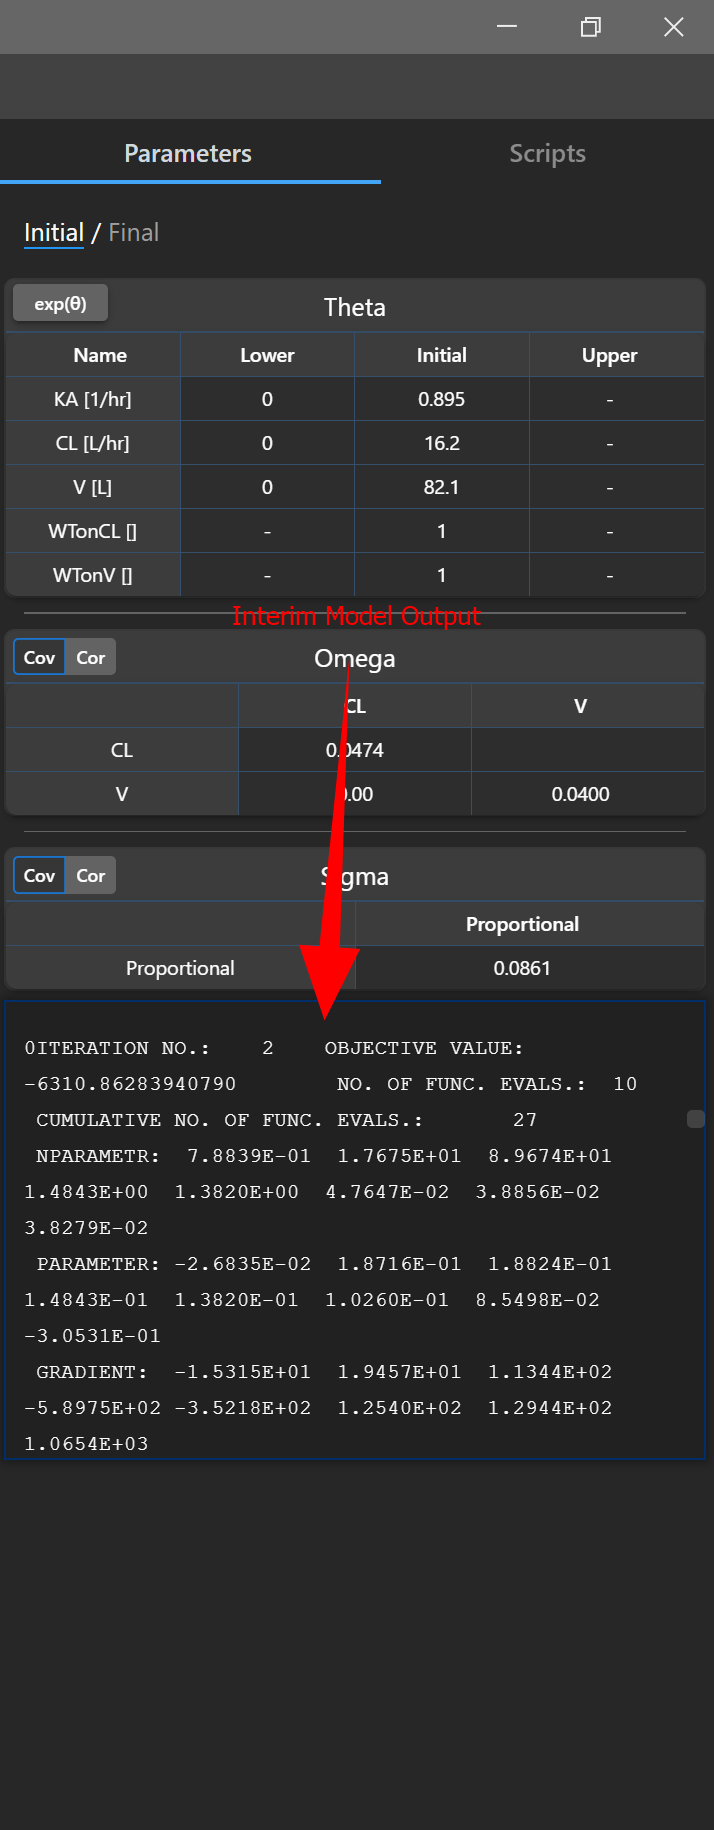
# Interim Output
You can see the output from a running process in the Initial tab in the right panel.
# Viewing Results
Once a model finishes running, Finch will automatically detect the mod1.xml file in the model directory and refresh the results in the Finch interface. Results for a completed run are pulled in from the mod1.xml file. If you are not seeing results for a completed run, please ensure the mod1.xml file was created.
# Main Results Table
Finch Studio pulls key information about the model results from the mod1.xml file and presents them in the RESULTS panel.
Name: Model name (derived from the model directory name)
Description: Model descritpion. This can be edited within the
MODELtab.Ref: Reference model, for purposes of calculating the dOFV as well as for ordering the models when showing the results in tree view.
nInd/nObs: Number of individuals/number of observations.
OFV: Objective function value.
dOFV: Difference of objective function value, relative to the reference model.
S: Successful convergence. S = Successful, E = Potential error during model run.
C: Successful covariance step. S = Successful, E = Error during covariance step
B: Boundary problem reported from nonmem. Blank = No issue, B = Boundary issue encountered.
Sig Digs: Number of signficant digits reported from NONMEM.
Method: Estimation method used.
AIC: Akaike's Information Criteria (by default not shown, configure and toggle in the
COLUMNSdrop down menu)BIC: Bayesian Information Criteria (by default not shown, configure and toggle in the
COLUMNSdrop down menu)
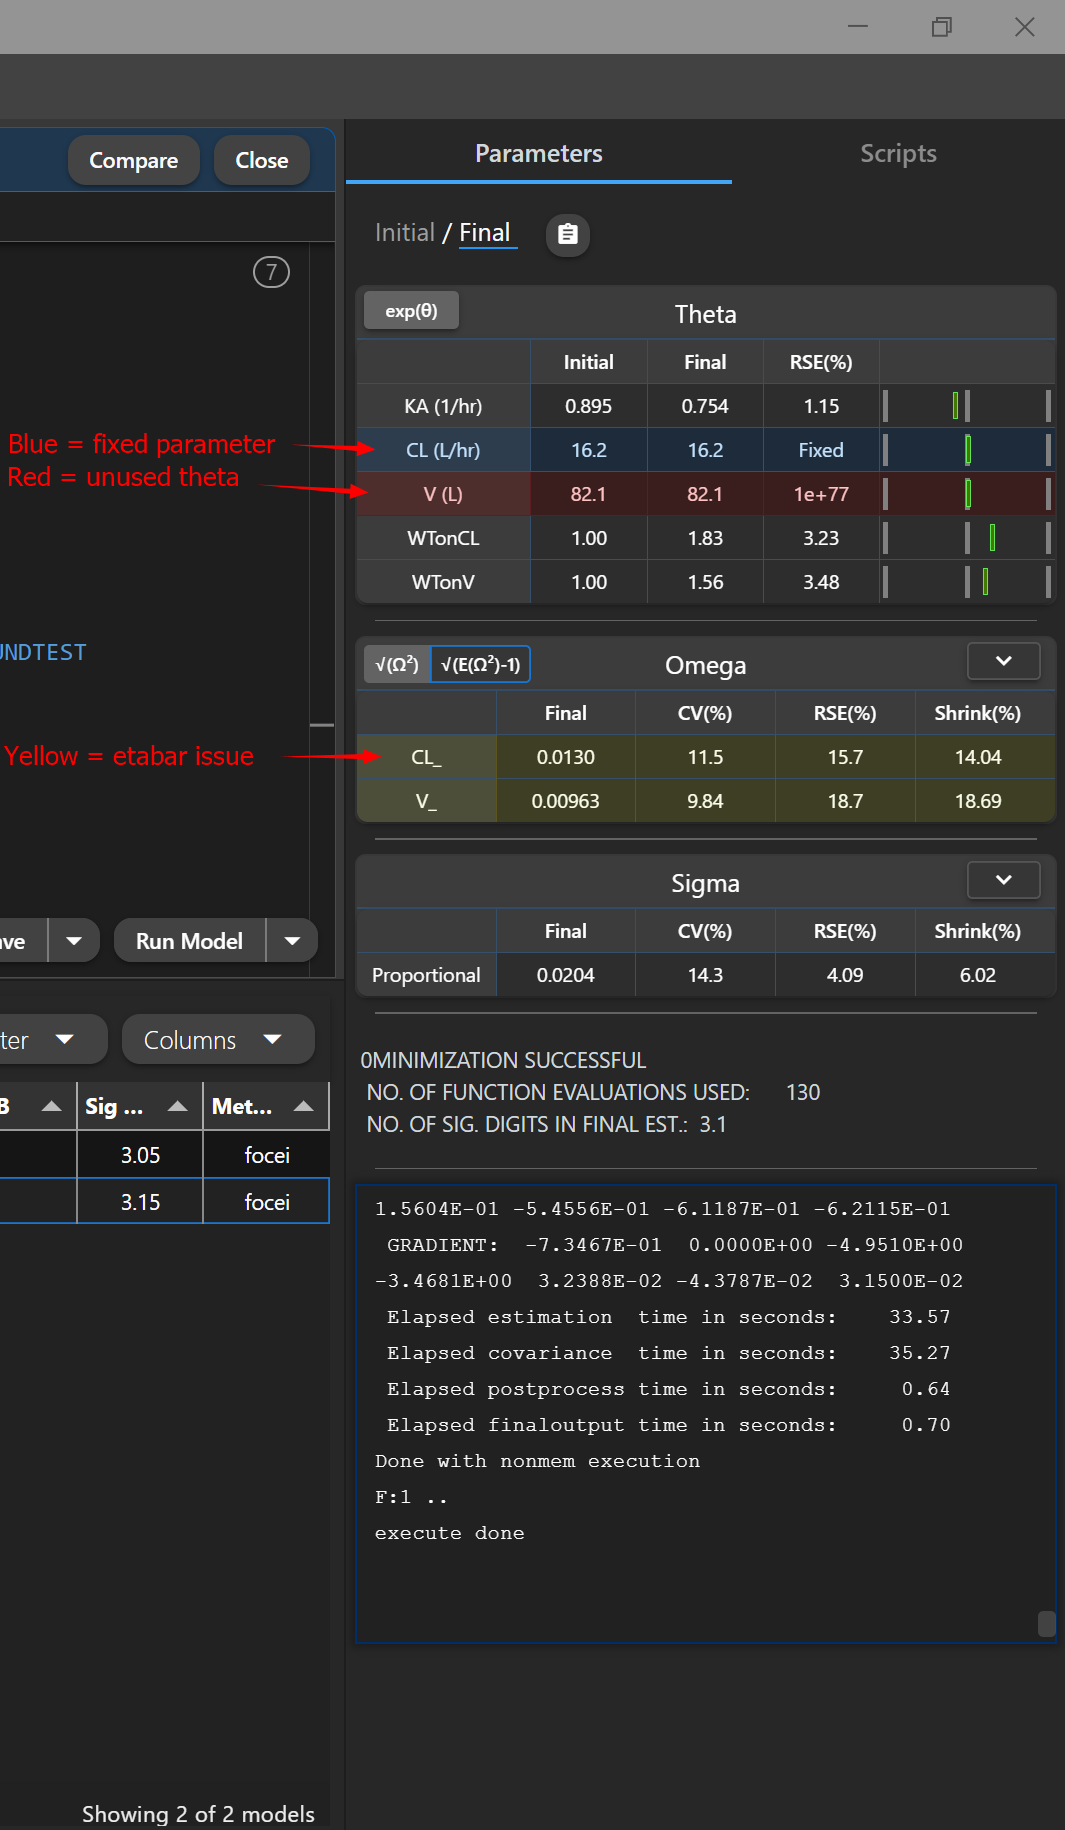
# Final Parameter Estimates
Final parameters estimates are displayed on the right panel under the Final tab. Most parameters will have a grey background. Parameters highlighted in blue indicate a fixed parameter, parameters highlighted in red indicate an issue estimating the parameter (most typically the parameter has no effect on the model), and omega parameters highlighted in yellow indicate a significant p-value for etabar (indidicating mean of etas are significantly different than 0, p < 0.05)
# Duplicating Models
Right click on the model you wish to duplicate, and click the Duplicate option. If the parent model ends with a number (i.e. 1-cmt-v1), the child model will use the next number in the sequence (1-cmt-v2). If the parent model has a completed run, you may choose to duplicate the model with the final estimates from that run.

# Comparing Models
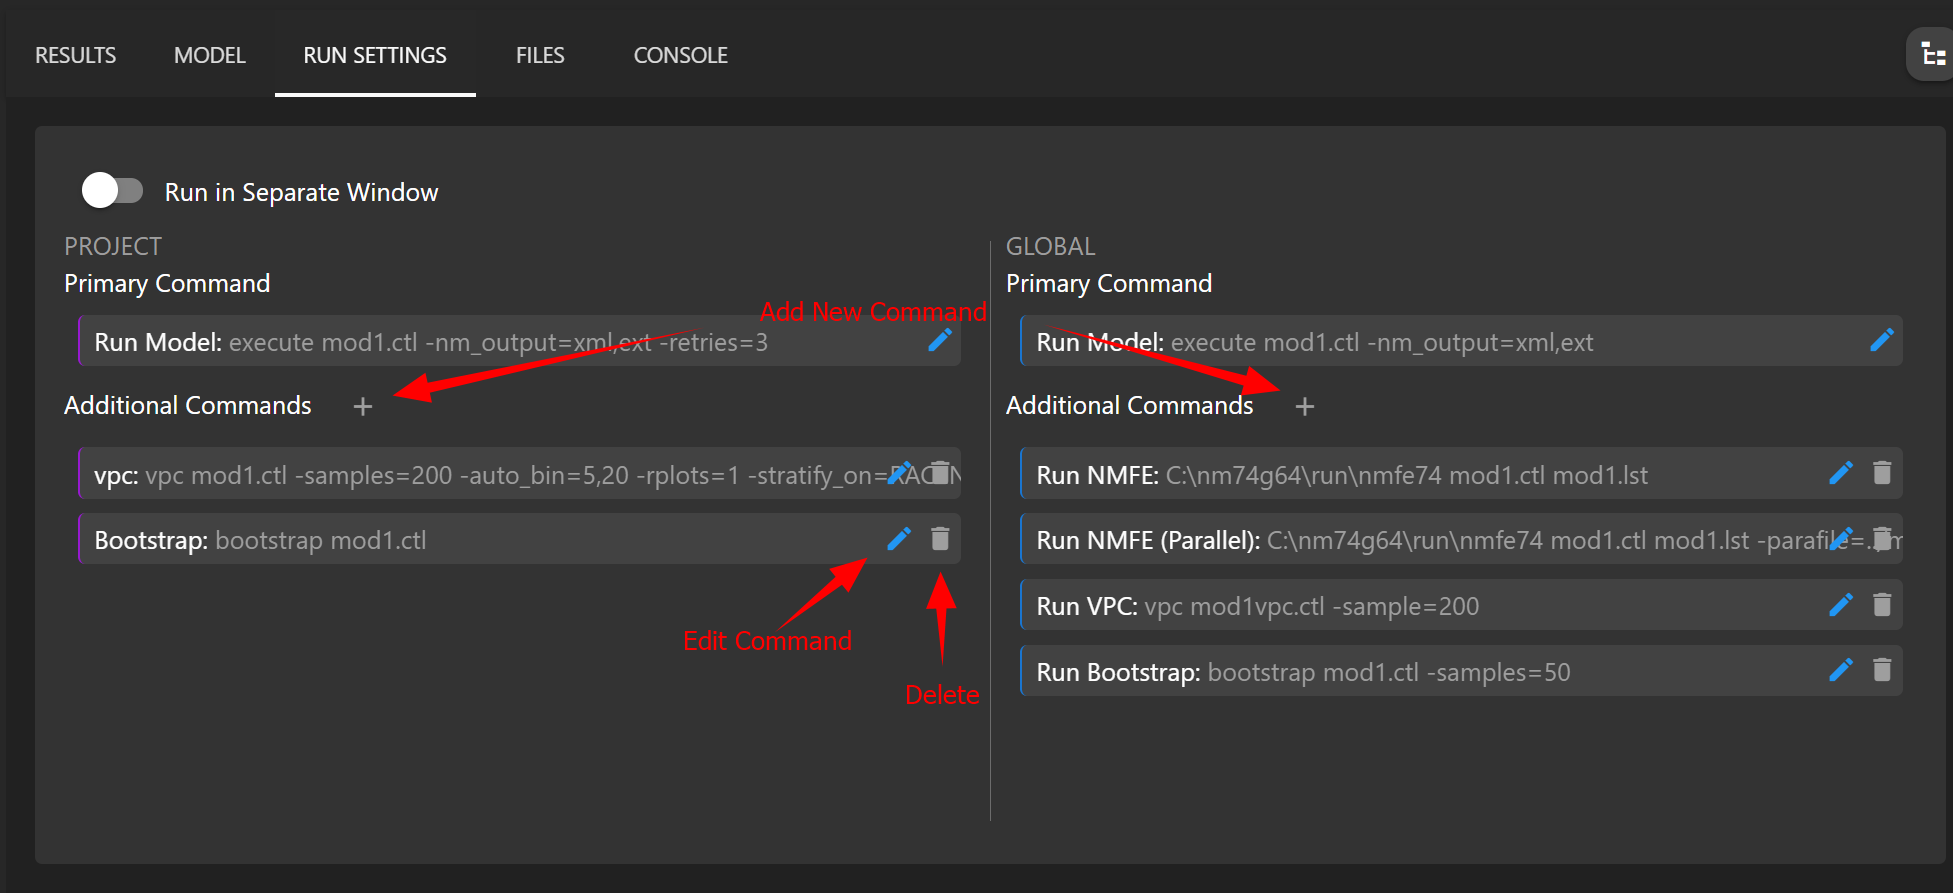
# Custom Run Commands
To add custom run commands, navigate to the Run Settings tab. In this panel, you can define project-specific commands or global commands (global commands will be available across all projects). Once a command is added, that command will be available when right clicking on the model and choosing a command to run.